Frequently Asked Questions

Known Issues with Notes Plus v6.x

This must be caused by a bug of v6.1 and our data migration tool. Apparently, stuck/crashing during data migration process is having some really bad downsides in iCloud resulting in the migration process taking longer. If it crashes, the app does not delete the folders which Notes Plus has already converted on the current run of the migration. The result is the next time the migration runs, Notes Plus would try to convert the same folders again. This is resulting in exponential copies of .NPN and folders for the same notebook. For a particular notebook in iCloud you could see 4-5 .npn files, also some files with the notebook name with “type” of “package” and no .NPN extension and the resource folder itself. Please take a look at this support topic https://community.writeon.cool/t/troubleshooting-data-duplication-problem-caused-by-cloud-syncing-feature-in-v6-2/304 or post your questions on our online community so we can help you.
On v6.2, the migration tool will download everything from iCloud server to your local iPad, then Notes Plus converts downloaded resource files into a new packaged files with extension .npn (each notebook is a single file rather than a bunch of resource files). This packaged format file is better for iCloud syncing and iOS Storage Optimization feature.

At the first time you launch app from iCloud syncing, it could take for a while if your app library has a lot of files/folders. You can do this to reduce downloading time if it’s stuck or taking forever:

At the first time you launch app from iCloud syncing, it could take for a while if your app library has a lot of files/folders. You can do this to reduce downloading time if it’s stuck or taking forever:

  • Quit Notes Plus from background (swipe up at the bottom and swipe up on Notes Plus to quit it from multitasking completely)
  • If you have a computer (either Windows/Mac), try to locate to iCloud Drive folder, find "NotesPlus Beta" folder, copy everything inside "Notebooks" folder and save it to safe place on your local disk. This would serve as your data backup later.
  • Delete extra copies of your notebooks: first, please check if your notebook content displays properly by opening Notes Plus Library, open the notebook without the number appended on your notebook name. If it looks good, you can keep it and delete all the extra copies. If your extra copies are cached (it displays with tiny cloud icon), then you can go to Library > Auto Backup > enable "Automatic Download" and the app will attempt to download cached files from iCloud to your local storage. Then, you can delete the copies.
  • An alternative method you can use to delete the extra copies of your data: go to iCloud Drive folder on your computer (Mac/Windows), delete the .npn files coming with a suffix containing the numbers. Wait for your file deletion syncs to iCloud fully. On your iPad, try to restart the device so it can "see" latest changes from iCloud server fully. Hopefully, this would help remove extra copies on your app library.
Note: if you don't install iCloud Drive on your computer, you can use a web browser like Chrome or Safari, access www.icloud.com, login with your Apple ID, then go to iCloud Drive > Notes Plus folder, tap to open "Notebooks", now select the extra copies of your data, tap "Delete" icon at the toolbar. The deleted files are kept on iCloud for 30 days and you can restore them if deleting wrong files (read this https://support.apple.com/kb/PH27917)
  • Restart your iPad (just to make sure nothing is cached wrongly): long-press the Sleep button for a while, power it off, then turn it back on
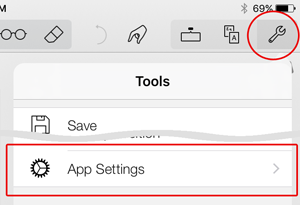
  • Now, launch Notes Plus and the migration will run again (or you can go to Tools > App settings > tap “Migrate” button).
You can increase Auto Lock value under iPad's Settings > Displays & Brightness > Auto Lock, just leave Notes Plus opened so it can execute the migration process.  Note: when you run the migration tool next time, it doesn't start from the beginning (though it'd say 0%) - the tool will skip for notebooks have been converted successfully and it should run faster on the next run. 
There is a system feature called iOS Storage Optimization, when your device is in low storage, the app will automatically evict those files to iCloud server and those files are accessible as on-demand download - you can tap on the cloud icon to download content of the files.
We're sorry for this experience. Data migration is never an easy process, but we need to tackle this process, and it's the foundation for future updates. Otherwise, it's hard to maintain syncing logic and extend the app. It turns out the migration is more complicated because the result varies a lot depends on user data set. We're trying to sort things out and overcome these troubles.
If you're experiencing issues with iCloud Drive and couldn't access your notebooks, please follow our instructions to restore the data from iCloud Drive backup and working on your notebooks normally.

- Go to Library > Auto Backup > turn off iCloud Drive syncing and choose "Delete From This Device". Don't worry, your data copy is still remained on iCloud Drive server. This avoids data duplication later. Or if you decide to keep the data on your device, make sure to remove your notebooks on Library before turning on iCloud Drive syncing again later to avoid data duplication.
- Download "Notebooks" folder from iCloud Drive folder on Mac/Windows (read this support article https://support.apple.com/en-us/HT201391)
- Compress "Notebooks" folder (or just specific notebook folders you want to restore) as .zip file (in any name)
- Connect your iPad into computer via Lightning cable
- Locate to Notes Plus Documents in iTunes File Sharing (see https://support.apple.com/en-vn/HT201301)
- Drag the .zip file back into Notes Plus Documents
- Re-launch Notes Plus app, wait for a moment and your notebooks will appear.

Troubleshooting

As a workaround, tap on the Palm Pad handle first, then pull it up further. Or you might want to go to iPad Settings >Control Center, and turn off Access Within Apps.
Please go to iPad Settings > Privacy > Microphone, and make sure “Notes Plus” is turned ON and try again.
It might be due to “Deletion Gesture” and “Scrubbing Gesture” being too sensitive. Please go to Tools > App Settings and try turning them off.
You can try one of these first to see if the app behaves well again:
  • Exit the app from the background: from the Home screen, double-press the Home button to reveal the background screen, then swipe up on the Notes Plus screenshot.
  • Reset to default settings: go to Tools > App Settings, and tap the button next to “Reset to default settings”.
  • Restart your iPad: long-press the Sleep button for a while, power it off, then turn it back on.
Try turning off one or more of the following in App Settings:
  • Use continuous scrolling mode
  • Save automatically
Our Dropbox auto-backup feature might also be the cause. Try going to the Auto Backup section and tap “Sign Out” if Dropbox sync is running.
Also try the above (see the previous question).
Please reset the app to its default settings (see a previous question).
Please make sure of the following:
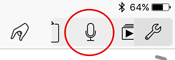
  • Go to iPad Settings > Privacy > Microphone, and make sure “Notes Plus” is turned ON.
  • No other apps are using the Microphone. To be sure, from the Home screen, double-press the Home button to reveal the background screen, then swipe up on the screenshot of every app except Notes Plus. You might want to also exit Notes Plus this way and relaunch it. This usually fixes weird issues.
Try using iTools to save “Notebooks”. Download and launch the application, click Applications (left sidebar), then ShareDocs (at the top), then Notes Plus (the list right below). Next, select “Notebooks” and click “Export”.
Your palm is probably being misunderstood as a four-finger swipe, thus activating iOS Multitasking Gestures. Apple doesn’t allow changing this setting by code, so you’ll need to turn it off in iPad Settings > General when using Notes Plus.
First, check that you’re using the correct recognition language for your text. For example, the HWR engine can barely recognize French text if its current recognition language is English. Second, try making the text box bigger (drag on the corner handle). Also, while the text box is selected, try tapping the “text” icon on the toolbar and setting a smaller font size.
First, make sure “Shape Detection” is ON in App Settings. Here are some tips to get a perfect shape:
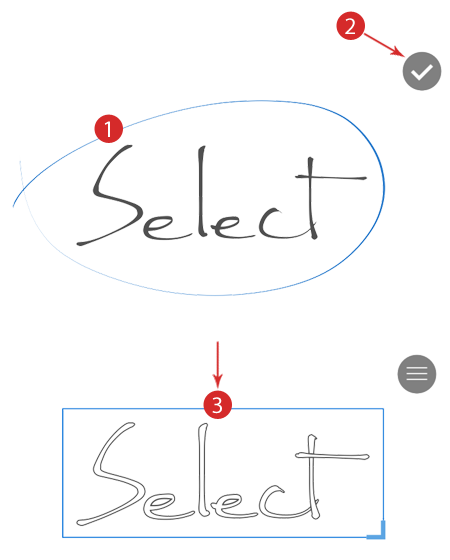
  1. Don’t draw too slowly;
  2. For polygons, try to draw sharp corners;
  3. For ellipses, avoid drawing sharp corners;
  4. Set a lower shape detection threshold in App Settings to increase the sensivitity.
This is a technical limitation of continuous scrolling mode where an object spanning two continuous pages won’t be “seen” by the app on the lower page. While we’re working on a fix, go to the higher page, select the object and move it entirely within a page.
Please take a moment to send us crash logs. They’ll help us identify the causes of the crashes quickly and fix them. As soon as the app crashes, please do the following:
  1. Connect your iPad to your computer.
  2. Launch iTools (a very fast iOS file manager for Windows; Mac version).
  3. Click Advanced > Crash log.
  4. Select the file(s) beginning with “NotesPlus” followed by the crash time. (Hold Ctrl while clicking to select multiple files.)
  5. Click Export and choose a folder to save the file(s) in.
  6. Email the file(s) to support@notesplusapp.com.

Alternatively, you can retrieve crash logs via iTunes, especially when you’re not on a Windows machine.

Thank you so much for your help!

General

Yes, there is! Tap Tools > Help > Quick Start. You can also get it here.
Please tap Library (top-left icon), swipe across the changed Quick Start notebook and tap the Trash icon to delete it. Then open the Quick Start Guide as above.
Just tap Tools > Help > User Guide. You can also get it here.
So far, the interface can be displayed in these languages: Chinese (Simplified), English, French (France/Canada), German, Italian, Japanese, Korean, Portuguese (Brazil), Russian, Spanish, and Vietnamese.
If you don’t see it in the Library, reset the app to default settings (see the Troubleshooting section below) and check again.
Tap Tools > App Settings. Most of the settings are self-descriptive. Consult the User Guide if in doubt.

Taking Notes

To go to the previous or next page, tap the < or > icon in the page navigation field.
There are also other ways:
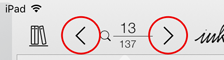
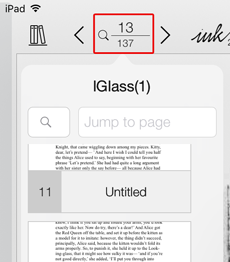
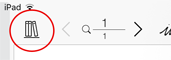
  • Tap the page number button, then tap a thumbnail, or enter a page number to jump to.
  • Long-press the right edge of the page (or the left if you’re in left-handed mode), scroll to find the right page thumbnail and tap it.
To select anything (including handwriting), just circle it in Pen mode and tap the ✓icon that appears. To select a shape, image, or text box, tap it once in Pen mode, then tap the ✓ icon.
Tip: After selecting it, tap the menu icon (three-parallel-line icon) that appears in the top corner of the selection to see what can be done on the object.
Long-press Undo on the toolbar to reveal the Redo button.
Just shake your iPad and tap Undo Typing right after you make a typo. A better solution is to use Notes Plus Extended Keyboard, which includes Undo/Redo buttons for text. Just enable this functionality in App Settings and you’re good to go.
Yes, there is. Tap Tools (top-right wrench icon) > App Settings and enable “Extended keyboard”. Then when the keyboard is visible, look for the date and time buttons in the topmost row.
Note: The date and time format follows system settings.
Check that the virtual keyboard is docked. Long-press the key in the bottom-right corner and choose Dock or Dock and Merge, whichever appears. You can also try disabling and re-enabling the feature in App Settings.
Switch to Pen mode (Pen icon) and long-press anywhere on the page.
Long-press one of the slots in the middle section and choose Pen (or the tool you need) for that slot. You can customize the other slots this way.
There is such a button, but it needs a bit of setup! Long-press a slot in the scrollable Quick Tools near the top-right corner and choose the last button in the list. Going forward, you just need to tap this button to enter close-up mode.
Unfortunately, Notes Plus doesn’t support inline formatting until a future update so you’ll need to use several text boxes and give each of them different formatting.
Currently custom backgrounds are not supported until a future update. That said, there’s a workaround:
  1. Import your PDF paper template as a one-page notebook;
  2. Make as many copies of the page as needed for your notebook;
  3. Annotate on these pages.You can also find more PDF templates from the Internet, like this site.
Notes Plus is designed to work well with any capacitive styli or just finger. However, if you prefer a fancy bluetooth stylus with fine tip and integrated palm rejection, we recommend Adonit's Jot (or Pixel) or Apple Pencil.

Recording

Swipe left/right in the scrollable Quick Tools area near the top-right corner and find the Mic icon.
If you don’t see it, long-press any slot there and tap on the Mic icon to assign it to that slot. Tap this Mic icon to start and stop recording.
Sure you can. The number of recordings made on a page is shown on the Playback icon next to the Mic icon. Tap the Playback icon to access the recordings.
Tap Library (top-left icon), and tap the Recordings section in the left sidebar.
  1. Export them to iTunes.
  2. Hook your iPad to your computer and launch iTunes.
  3. Open “Notes Plus Documents” (http://support.apple.com/kb/HT4094).
  4. Save the .caf files from “Notes Plus Documents” to your computer.
For more details, see “Save recordings to your computer” in the User Guide.
Sorry you can’t. To convert .CAF files into the MP3 format, check out this site: http://media.io.

Handwriting Recognition

In Pen mode, circle some handwriting then tap “✓” to select it, then the menu icon (three-line icon), then tap Convert to Text.
Tip: Tap “>” next to “Convert to Text” to choose the recognition language or tap More and download more languages.
We support the following languages: Arabic, Armenian, Azeri, Basque, Bulgarian, Catalan, Chinese (Simplified & Traditional), Croatian, Czech, Danish, Dutch, English (Canada/UK/US), Estonian, Finnish, French (Canada/France), Galician, German, Greek, Hebrew, Hungarian, Icelandic, Indonesian, Italian, Japanese, Kazakh, Korean, Latvian, Lithuanian, Malay, Norwegian, Polish , Portuguese (Brazil/Portugal), Romanian, Russian, Serbian (Cyrillic/Latin), Slovak, Slovenian, Spanish (Mexico/Spain), Swedish, Thai, Turkish, Ukrainian, Urdu, and Vietnamese.
Just select your handwriting, tap the menu icon, then tap the “>” icon next to “Convert to Text.” Then you can select a language from the list or tap More and download new ones.
First, select the converted text (tap on the text and then tap “✓” to select it). Then tap on it again to edit just as you would with a text box.
Unfortunately no. We think on-the-fly conversion is not really efficient in terms of performance and convenience, since users would have to repeatedly go back to the time-consuming process of editing wrongly converted text.
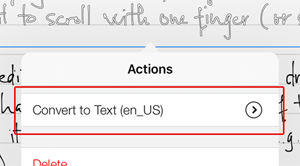
  1. Write in straight lines, leaving ample space between each line.
  2. Avoid complicated layouts, multiple columns etc. Write in clear horizontal blocks of text.
And make sure the recognition language is intended (see a previous question).

Organization

You can put them in the root folder or in another folder. The hierarchy is similar to that on a computer. Folders contain notebooks, which in turn contain pages.
Tap the Library (top-left icon). The right panel lists all the notebooks and folders. The left sidebar shows various sections and possible actions you can take when some items on the right are selected.
Tip: turn your iPad to landscape to see the text next to each icon in the left sidebar.
Open the library, tap New Folder, type a name and tap the return key. You can go to this folder (tap on it in the right panel) and create subfolders within it by repeating these steps.
Open the library, go to a folder (on the right panel) where you want the new notebook to be created. Tap New Notebook, type a name, change other settings as needed, and tap the return key.

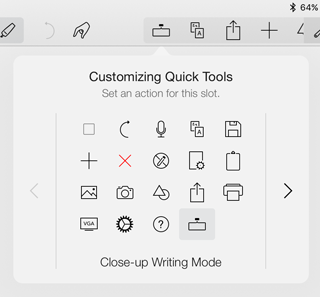
Tip: while taking notes, you can quickly create a new notebook by tapping the “plus” icon in the scrollable Quick Tools area near the top-right corner, then tap Create New Notebook.

To copy/move one or more notebooks, tap Library (top-left icon), tap Edit (top right), select the notebook(s), tap Copy / Move in the sidebar, select a destination folder and tap Copy / Move in the header.
Tap Library, tap the “>” icon to the right of the first notebook in the library view to list its pages, tap Edit (top-right Pen icon), select one or more pages, tap Copy / Move in the sidebar, select the second notebook and tap Copy / Move in the header.
Tap Edit (top-right Pen icon), select the item, tap Rename in the left sidebar and give a new name. Tips:
  • You can swipe across a notebook, tap the first icon and rename it.
  • While taking notes, tapping the notebook name near the top-left corner will allow renaming it.
  • While taking notes, tap the page header in the top-right corner of the page to rename the current page.
First, list the pages in List view: tap “>” to the right of the notebook in the library, then switch to the button that stays right below the Pen icon in library view. Tap the Pen icon to enter Edit mode. Drag each page up or down at the handle to its right. Tap the ✓ when done.
You can search for notebook/folder names, page titles and typed text (including converted text, even if it’s not visible). To do so, tap Library (top-left icon) and tap the Magnifying Glass icon near the top-right corner. To search within a specific folder/notebook, list its pages first, then proceed as above.
Tap Library (top-left icon), tap Edit (top-right Pen icon), select the notebook, tap the Lock/Unlock button in the sidebar and confirm. Then create a new password or enter the existing one.

Importing & Exporting

Notes Plus can import PDFs and Microsoft Word documents (but not Google Docs formats). Support for other Office formats are coming. Notes Plus can export in PDF, PNG, and WebArchive (useful for sharing editable notebooks with other Notes Plus users; see a question below).
There are a number of ways:
  1. Use File Sharing and add it to “Notes Plus Documents”. Close and re-open Notes Plus and it will appear in the library. Tap on it to get it ready for annotations. This is the most reliable method.
  2. Long-press an attachment in an email message and choose “Open In Notes Plus”. If the attachment is large, you’ll need to tap it first to download it, after which you can long-press it and reveal the “Open In Notes Plus” option.
  3. Load it in another app (Safari / Dropbox / etc.), then tap the Actions button and choose “Open In Notes Plus
  4. Load it in Notes Plus browser (swipe right at the left edge to reveal this panel), then tap Import.
  5. (If it’s in a cloud account) Open the library and go to the Import section. Add a remote account if necessary. Tap to open the account and browse to the file and tap it.
Open it, tap Tools (top-right wrench icon) > Export. Next, tap each of the settings and choose a desired option. Tap Export.
Currently no. There will be an “Export as Text” option, though. Meanwhile, you can use iOS standard copy/paste command as follows: select ABC mode and tap on the text (or select T mode if you typed full page), tap again > Select All > Copy. Then go to another text field (e.g. your email), tap there and then tap Paste.
Just export a notebook with the following settings:
  • Destination: Mail
  • File type: WebArchive
Then enter the email addresses of the recipients. They will then long-press on the .webarchive attachment in the received email and choose “Open In Notes Plus”. Note: there’s a technical limitation where you can’t properly export PDF notebooks as WebArchives – the original PDF pages won’t be included.
Please export the notebook to another app, then choose the cloud app (like OneDrive) from the list of apps. This will upload the exported notebook to that cloud.

Backing up Data

Yes, Notes Plus does offer automatic backup. Your notes get backed up automatically to a cloud service of your choice. Notes Plus provides automatic backup with Apple's iCloud and Dropbox.
iCloud auto-backup automatically backs up your notes to Notes Plus app location on Apple's iCloud.
  • Each time you insert or edit a notes, your changes are updated on iCloud automatically.
  • When you get a new device and want to restore your notes, install Notes Plus app and it will restore your notes from iCloud automatically.
  • If you use multiple devices to take notes, Notes Plus syncs your iCloud data across multiple devices automatically.

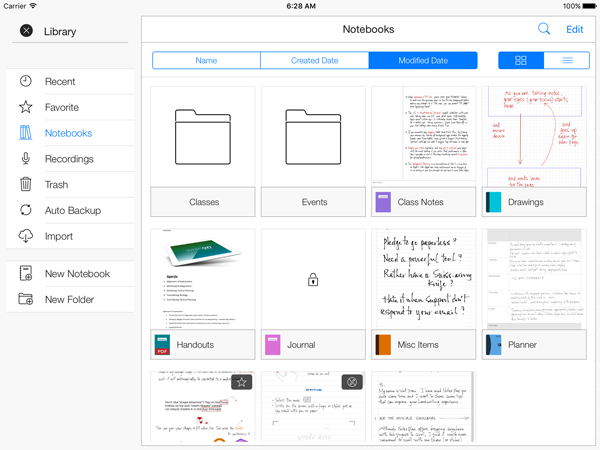
To use iCloud auto-backup, while in Library, tap on Auto Backup button on the left panel.

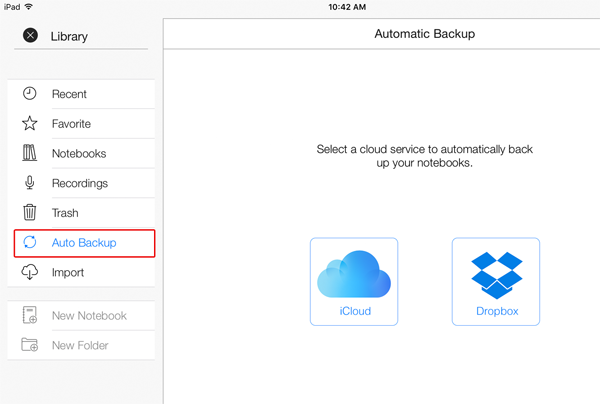
Tap on iCloud icon in the right panel then tap on "Start Using iCloud". First time iCloud initiation takes a few minutes, please keep the app open until iCloud initiation finishes.

It automatically backs up your Notes Plus data to a preferred location (aka backup folder) in your Dropbox account and restores the data if needed (for example, when you reinstall the app, or install it on a new or restored iPad).
  • If you add an item (i.e. a notebook / folder) in Notes Plus, it will be uploaded to the backup folder in Dropbox.
  • If you delete an item in Notes Plus, the remote version in Dropbox will be deleted.
  • If you add a supported file under the backup folder, it will be downloaded to Notes Plus library.
  • If you delete an item under the backup folder, the local version will NOT be deleted from Notes Plus. Instead, Notes Plus will re-upload the newly deleted item to Dropbox.

To start using this feature, while in Library, go to the Auto Backup section and tap Dropbox icon.

To back up data:
  1. Hook your iPad to your computer and launch iTunes
  2. Locate “Notes Plus Documents”. Read about File Sharing (see http://support.apple.com/kb/HT4094 ) and you will know where that is.
  3. Save the Notebooks and Recordings folders from “Notes Plus Documents” to your computer
To restore data from the Notebooks folder:
  1. Compress its contents in a .zip file (any name)
  2. Add the file to “Notes Plus Documents”
  3. Exit the app from the background and relaunch it
  4. Wait while the app unzips the backup and loads it before you can see your old notes. The .zip file will be deleted from Notes Plus Documents when this process is done.
Method 1 - via iCloud, for a brand new or restored iPad:
  1. Install Notes Plus on the new iPad.
  2. Go to Library and turn on Use iCloud Auto-backup (see question above). Notes Plus will pull your notes from iCloud to your iPad automatically.
Method 2 - via Dropbox:
  1. Use Dropbox auto-backup on the old iPad. Wait a while for the notes in Notes Plus to be uploaded to your Dropbox account.
  2. Use Dropbox auto-backup on the new iPad. Wait a while for the notes in Dropbox to be downloaded to your Notes Plus library.
Method 3 - via iTunes:
  1. Connect your old iPad to iTunes. Via File Sharing, save the Notebooks and Recordings folders from Notes Plus Documents to your computer.
  2. Compress the contents of Notebooks (or just certain notebooks you want in it) in a .zip file (any name)
  3. Connect your new iPad to iTunes. Add the zip file (in step 2) to Notes Plus Documents (refer to the File Sharing link above).
  4. Launch Notes Plus in the new iPad. Wait while the app unzips the backup and loads it before you can see your old notes. The .zip file will be deleted from Notes Plus Documents when this process is done.

If you’re migrating recordings, please also do:

  1. Download and launch iTools.
  2. Click Applications > ShareDocs > Notes Plus.
  3. Click Import > Folder and select the Recordings folder that you backed up.
We’re afraid it can’t at the moment. Generating a PDF for every change made to a notebook is an expensive operation that could hang your iPad if not implemented carefully, but we’ll keep exploring this.
We understand your privacy and we NEVER use Dropbox access for anything outside syncing your own notes created in Notes Plus. The reasons why we ask for full access are:
  1. Notes Plus needs to create a folder within Dropbox named NotesPlus that stores all your backup files.
  2. For flexibility, we allow users to change this default folder to a different one. Other apps with auto backup to Dropbox (i.e GoodNotes/Notability/GoodReader, etc…) are doing the same thing, requesting full access to all files and folders.

You can always monitor the sync log on Dropbox’s website via https://www.dropbox.com/events.

In-app Browser

In case you haven’t known, there’s another panel in addition to the paper panel where you take notes. Just swipe right at the left edge to reveal it. (Tip: Turn your iPad to landscape first to make it easier.) Other useful things you can do with the browser:
  1. Open a notebook for viewing while taking notes in the paper panel. See the next question.
  2. Use an online calculator, like http://instacalc.com.
  3. Open a clip art site and use an image there in your notes. Check out this great site for royalty-free images: http://openclipart.org.
  4. Check email, Google Calendar, etc.
  5. Handwrite your search queries in Google!
  6. Create images of equations and send them to the other panel into your notes. Open this site. http://webdemo.myscript.com, and tap Math.
If you discover any other good uses, please let us know. Thanks in advance.
Absolutely! Just tap Library (top-left icon), swipe across a notebook and tap the dual-panel icon next to the Trash (Delete) icon. Note that the browser panel is for viewing only.

Others

We do, but not in the near future, as we’re focusing on bug fixes and usability improvements on this iOS version. It’s never a good idea to migrate the same bugs and weaknesses to another platform, so we believe users of these platforms will benefit a lot from this wait. We do have what we consider a free, lighter version of Notes Plus, called INKredible on iOS, and INKredible on Android. You’re invited to download the FREE app on your device to get a feel for the inking technology that we use in Notes Plus.
While we don’t have plans for TextExpander in the near future, you can take advantage of a similar built-in feature of iOS 5 – “shortcuts”. Just tap iPad Settings > General > Keyboard > Add New Shortcut…
We’re afraid this is currently impossible because Evernote has limited third-party calls to its services.
We’ll implement it in the future. Meanwhile, you can long-press on “-” on the keyboard and get a bullet. Better yet, create a shortcut for it (see the previous question).
Press the Lock and Home buttons on your iPad simultaneously, then check in the Photos app and email it to us along with your question. Alternatively, you can upload it to a free image hosting service like PostImage.org and include the image link in your comment.
Please email us (support@notesplusapp.com):
  1. Steps to reproduce the bug
  2. Screenshots if they help explain it.
We also welcome suggestions and ideas to make the app better. Let us hear what you think.